Overlays
An overlay is map that normally contains zones, that has been pre-processed in external software and you would like to import that map into the software for comparison with other information. We currently support EM, Yield & Elevation. Other types can still be imported provided that each set rows, contains a min & max value.
Prerequisites
- Farm
- Paddocks
- Shapefile (Pre-processed)
Farmacist connect doesn't do any processing on the file you are trying to import, you will need external software like SMS Advanced, QGIS with those capabilities. If you have know idea about any of that, talk to your agronomist.
Shapefile format
A shapefile consists of several files and is more than just the .shp file that people normally refer to:
Parts of a shapefile: .cpg .dbf .prj .qmd .shp .shx
For importing an overlay you will need to have two of these files handy, the .dbf and the .shp. Additionally the attribute table will need to have Min & Max values, or at least values indicating these values as the name of the fields can be changed during the import.
Example:
| FeatureId | Min | Max |
|---|---|---|
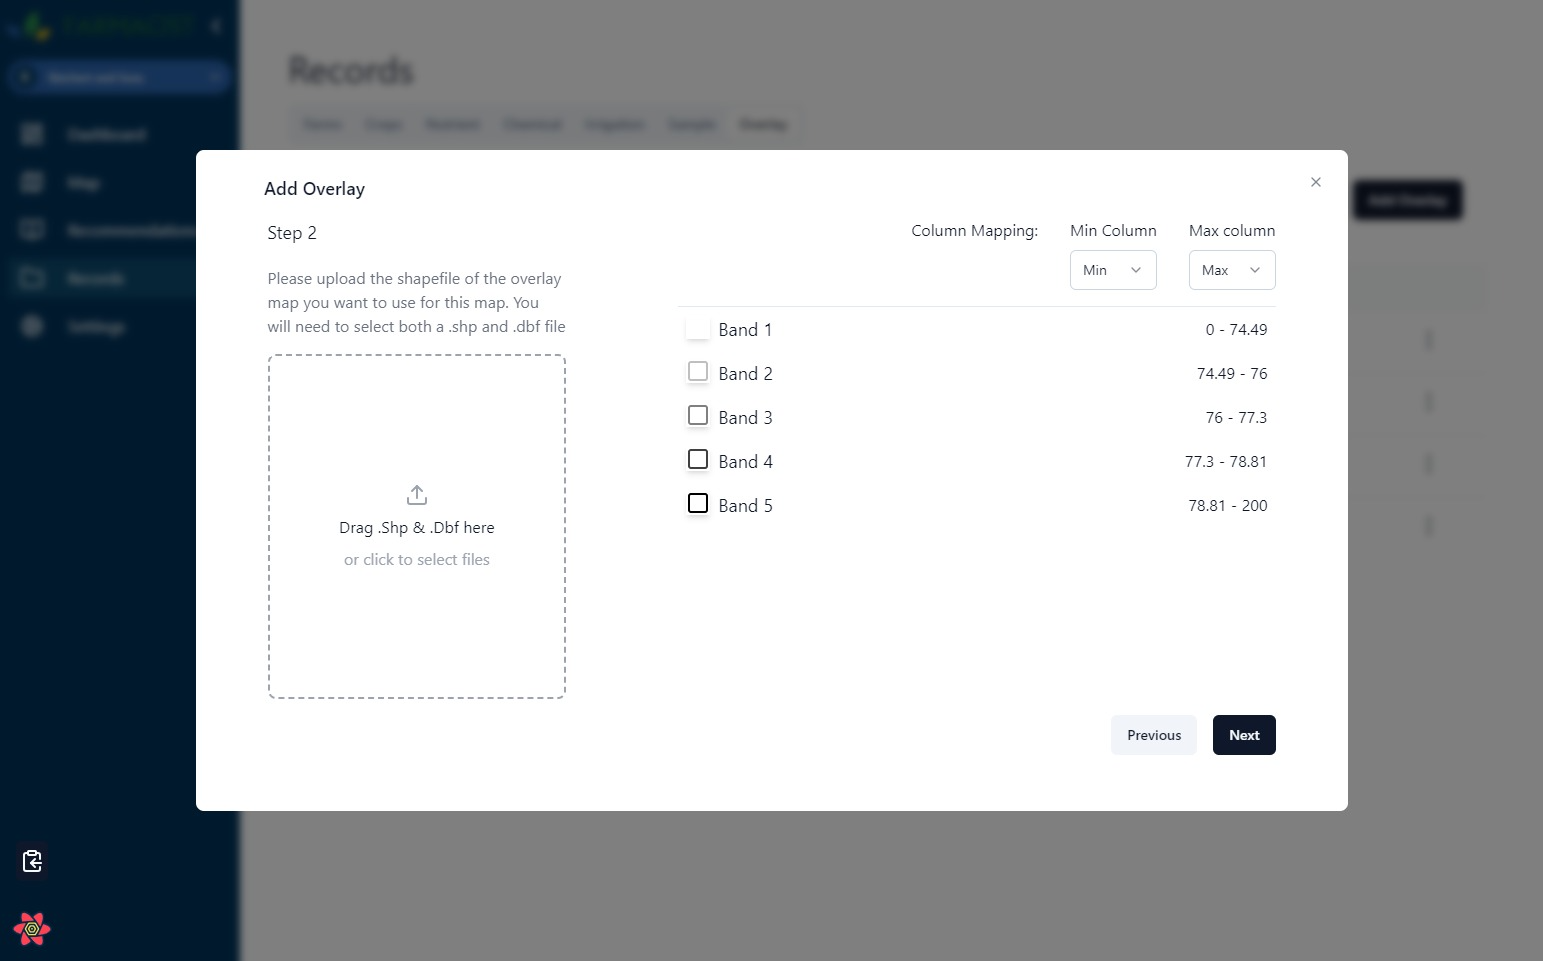
| 1 | 0 | 74.490000000 |
| 2 | 74.490000000 | 76.000000000 |
| 3 | 76.000000000 | 77.300000000 |
| 4 | 77.300000000 | 78.810000000 |
| 5 | 78.810000000 | 200.00000000 |
Importing
Overlay Details
Navigate to Record => Overlays and press the "Add Overlay" button, this will open the import form.
Fill out the details:
Map Name - a name to indentify this map by
Machine - The type of machine/equipment used, i.e. drone, TSM Mapper
Type - The type of map produced, either EM, Yield or Elevation
Attribute Linking
Now you will need to either, drag your .shp & .dbf files (at the same time) or click in the box on the left an select the files and hit open. Once done you will see it automatically link if you are using attribute columns called min/max.

If you're columns weren't automatically mapped but you have the correct data, use the min max dropdowns on the top right to adjust mapping, i.e. if you don't have min max but have columns called "Minimum" & "Maximum" you should seed those values in the dropdown to select, provided everything is correct it should then map the values to each band. Proceed by clicking next.
Visual Confirmation
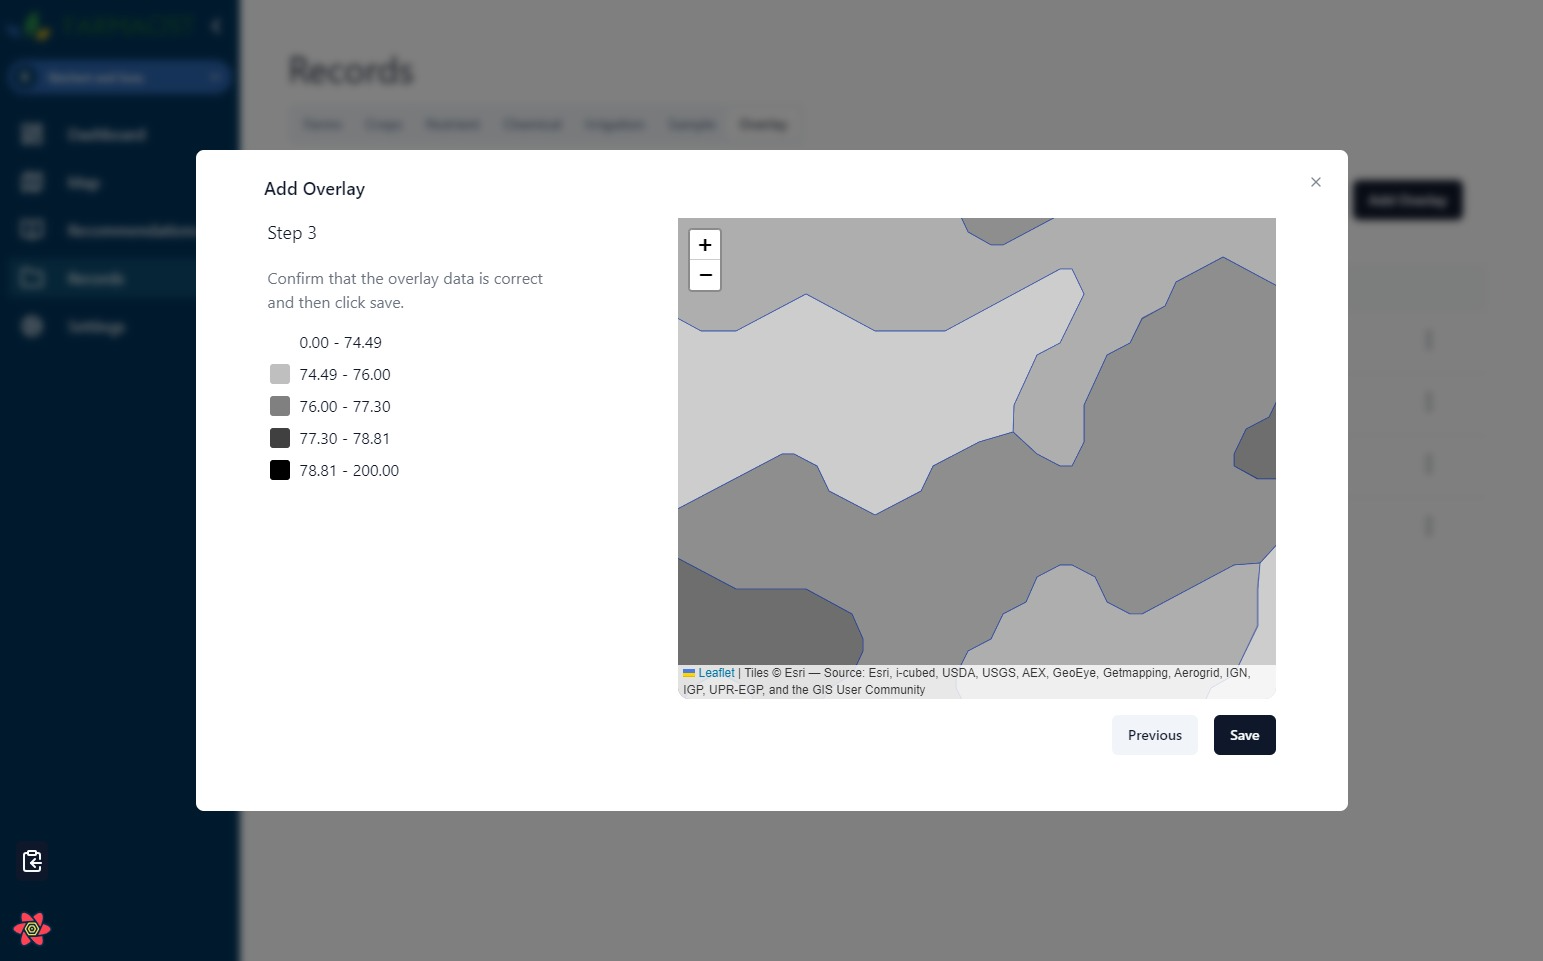
You should now see a map with the files you just imported, coloured by their band colours in greyscale.

If everything looks good, hit save and thats it! you should see a popup banner saying overlay added succesfully!